Pages

Monday, April 29, 2013

April Baby

My son's sister-in-law just had a new baby boy! So exciting...  she and her husband now have three sons. Griffin... a new brother for Cole and Hunter, and new cousin for Carter, Mason and Avery- the single girl in the mix!  Here's my card...


The Wild About You SU set, one of my favorites, as I have been looking forward to trying the technique of popping out the elephant's ear and the little lion's mane. As usual, I got the idea from a card on Pinterest.  I hope the picture shows how cute it looks! One thing I didn't do though, was to add another layer to the lion with his face. Next time...

I used a piece of speciality paper that I've had for scrapbooking with "brother" and it was off-white so I layered the naturals white mat over the white card base. The ink is daffodil delight and marina mist with matching ribbon. I used the small heart from the owl punch with crystal effects to give it added pop (an idea from Kristina Werner) and added dots around the stamps before I layered with marina mist. I also punched a spot on the side of the card for the ribbon and it did help it lay down to attach easier  (idea from Julie Embersole). The giraffe and welcome little one stamp on the envelope were the finished product! 


Thursday, April 11, 2013

April Birthdays

Both of our sons-in-law have April birthdays, although a week apart. We just couldn't be more blessed with the husbands of both of our daughters... they really are like sons in the family!  Here are the cards that I made to celebrate each of their special days...

I took this design directly from Pinterest knowing how much Chris loves to play his guitar. I changed it up in very minor ways, really just copying the awesome design... I used thread for the strings, and brads to hold them down. The crumb cake color was enhanced by shading with distress ink, wild honey. I also used the happy birthday stamp from an SU stamp set.


The inside and the envelope both used a little star from a random set, but it was my first try with chalk ink. I love it and can't wait to try the bold colors again. They are definitely on my wish list for new supplies!


Steve's birthday gives me another golfer so I used the design from February. Again it is almost an exact copy from a Pinterest card and I used DSP paper for the first card layer and built the landscape from there. I used the small dot embossing folder for the golf ball and embossed the sentiment with white to add a little texture to the card. 


I also have a good friend with an April birthday, sent a card but forgot the picture... Oh well! I will remember next year...


Friday, March 15, 2013

Getting Ready for April

Our grandson Thomas, will be 3 on April 2! He is such a treat to spend time with, never know what he's going to come up with. I do know that he is such he can do anything his big brother Will can do, and that includes Legos. So his card is a Lego 3!

It is difficult to see the embossed cupcakes in the background- another favorite of Thomas! The Lego blocks are made with 1 inch and 1.5 in rectangles and backed with black. The dotsa re made with a hole punch and put on with dimensionals that are cut very, very small! I read on a blog recently that Kristina Werner uses folded glue dots for the same effect. Believe me, I will try that next time! My favorite Curly Verses add the sentiment for Thomas's card.

Easter

I had grand thoughts of Easter cards with bunnies this year, but it didn't happen! I even had one almost together, with ears that flop up, but maybe next year! I did make a card for Mom to send with an Easter greeting however...


I used the SUJust Believe stamp set on Crumb Cake with Real Red as the coordinating color with ribbon to match. The idea came from a card I saw on Pinterest. One of the things that I love about Pinterest is the ability to case other cards and just change something to feel like I really could do something like that!  I added the brads and popped up the sentiment to add some dimension to the design. I love how this card came out!

Birthdays

The beginning of March always puts in mind - SPRING! By this time we are so ready to see the beginning of the next growing season hidden under that blanket of snow!

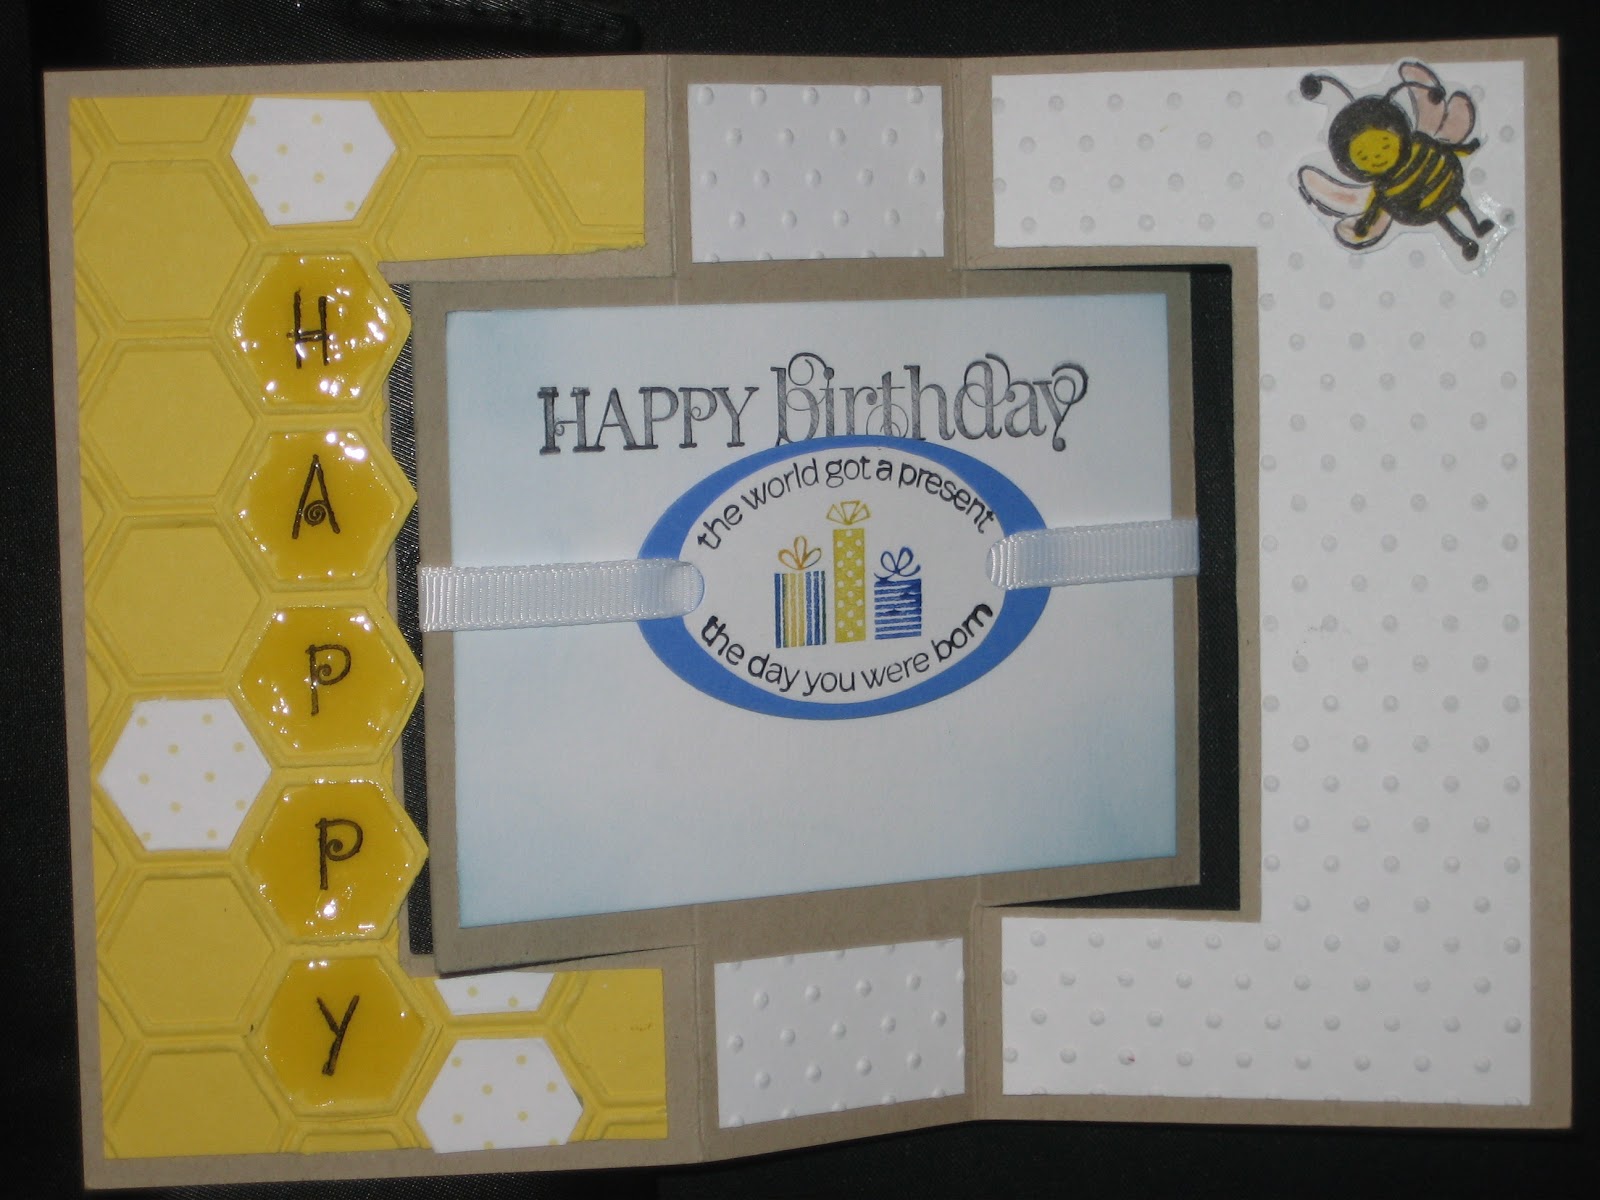
Jessica's birthday, on March 21st began our journey as parents. We have been so blessed for sure with Jessica and the REAL start of our lives as a family.  And in some way I wanted to share that sentiment with my card.  


This is a closed front view of the flip/flop or swinger card. I used the Mixed Blossom SU stamp set and punch along with Just Buzzin By SU stamp set. The colors are Daffodil Delight and Ballet Blue. The cover is embossed with the honeycomb folder on the front and the small dotted swiss on the white. I cut a few honeycomb size fillers from the DSP to add some detail on the cover. The letters are stamped and then filled with crystal effects to look like a real honeycomb. I love the way the edge shows up when the card is opened!


Here are some smaller photos of the other views. I cut the bees and used dimensionals to make them pop up. Because I am OBEE it has an added significance (:  Happy birthday is stamped with curly verses, which I use all the time!  I am still trying to make the opened card look more together and in looking back, maybe should have chosen an orange and chocolate chip combo? 


Thursday, February 14, 2013

Getting Ready for March

Today is Valentine's Day and I had a great day getting ready for some of the March events with cards! I started with my daughter-in-law's birthday for March 1st. I really wanted to try the "swing" card that I saw a video for on Pinterest. It was so much fun to make and relatively easy...


Here is the folded front of the card. The middle "swings" showing the greeting when you open it.  Erica loves sunflowers so I couldn't resist two large Mixed Bunch flowers- doubled- and then cutting into the petals after punching it out. The DSP made a perfect center for the sunflower, as well as the second layer on the card base.


Here's the opened card with the greeting! I just love the technique! The cute little bees from SU Just Buzzin' By, corduroy button, baker's twine and the 7/8" scallop flower made great additions... after all I am O-BEE. The honeycomb embossing folder on the edge yellow is hard to see in the picture.

Here's a picture of what it looks like from the side. How cool is that? Colors are SU Summer Sun(retired) and Early Expresso paper. 

Then I moved right on to St. Patrick's Day! We'll be away so I need the cards ready to send to the family. I saw got an idea from Pinterest, and decided to make the large shamrock from the heart punch, then embossed in dot folder. Folded hearts together on one heart from the  Hearts a flutter die. I love the way it came out! I used Garden Green and Certainly Celery for the greens and a DSP green for the bottom segment of the card. The ribbon was ok, but I liked the little pearls better, covering them with crystal effects.


Still have a couple of birthday cards on my list of things to do, can't wait!

Monday, February 11, 2013

Valentine's Day

Valentine's Day has always been a favorite holiday for me. As a teacher (in a past life :) it was a time the kids always had good thoughts about each other. It was always encouraged, even suggested that cards be sent to everyone in the class in the younger years. So some kids that never got positive reinforcement from their peers, were accepted by peers even if for only one day! SO I do send Valentine cards to my family... Here's this year's selection:

I used a selection from the Heart's-A-Flutter set with stamps and dies to create a mix of red, pink, white and black to make to cards for family and friends this year. I just love the dies and embosslits. It was my introduction to really coordinating the sets. LOVE, love it! Used the hearts embossing folder or the dots embossing folder for the white layer on the card. On some of the pink I used dimensionals to raise the heart to add interest to the front although you can't see in the picture.

But this was the best.... In each family card I added grandchildren valentines from the heart die! I love how they came out! By cutting the die leaving the top of the heart out, it became a hinge for the heart... Soooo cute!


I used washi tape to close the valentines until those little hands get them!  Some times I do get a good idea... all on my own!  Happy Valentine's Day everyone!